Inserting an Image Into a Frame Title Block
| This task will show you how to insert a .gif image into a frame title block. |
| Before You Begin, make sure you customized the following:
Grid: |
| Open the GenDrafting_part_titleblock_insert.CATDrawing document. Make sure you are in the background view (go to Edit -> Background from the menu bar). | |
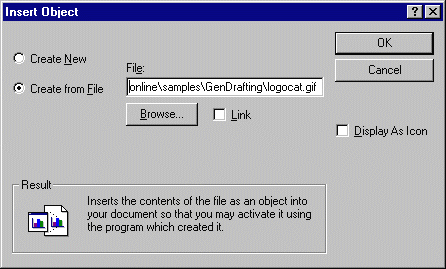
| 1. Select the Insert->Object items from the menu bar.
2. The Insert Object dialog box appears. You can either create a new object or re-use an existing file. 3. Activate the Create from File option from the Insert Object dialog box.
4. Select the required .gif image from the Insert Object dialog box. 5.
If needed, modify the position of the newly inserted object by dragging it
with the cursor. |
|
|
This is what you get:
|
|
| For creating front views, go to Edit->Working views menu bar
before clicking the Front View icon.
Of course, if you add sheets, the frame title block appears in the newly created sheets on the condition you go to Tools->Options command (Mechanical Design-> to the left of the dialog box, Layout tab). Check the Sheet set as default, or first sheet option or still the First sheet option, and you will insert the frame and title view from a sheet you previously created on the current drawing. Be careful: if you have a viewer installed with the gif type that is associated to the viewer, you will not visualize the inserted image properly (an icon appears instead). If so, click on the displayed icon to get the right image |
|
|
|

