Setting View Relative Positioning
| The purpose of this task is to re-position a Generative or Interactive view relatively to Generative or Interactive elements (a line/callout, a point or the frame of a view). |
| Before You Begin, make sure you customized the following settings:
Grid: View names and scaling factors: |
| Open the GenDrafting_part_positioningview.CATDrawing document. | |||
|
|||
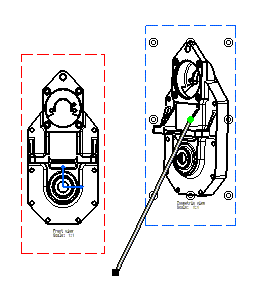
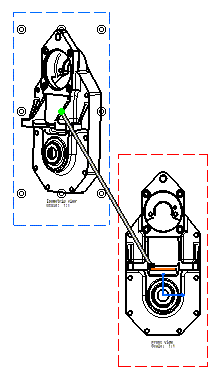
| A direction positioning line appears that is related to the isometric
view. This isometric view can be positioned as desired and relatively to the front view. Note that the isometric view is assigned anchor points.
|
|||
| 3. Select the direction positioning line end black square point. Once you have clicked the end square point, this point becomes a blinking red end point and remains so until you select a point or a view frame. You can also click the direction positioning line. In this case, the positioning line becomes a blinking line and remains so until you select a line (callout line).
|
|||
Press the Ctrl key to move the positioning line according to a direction that is perpendicular to the positioning line.
|
|||
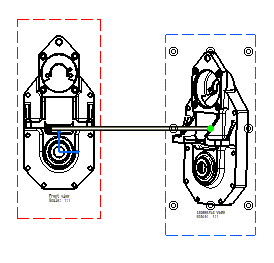
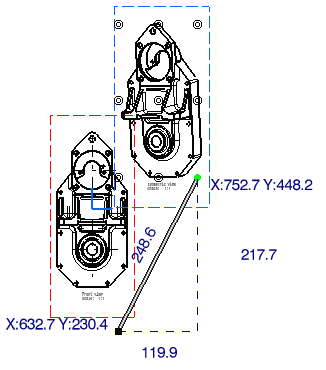
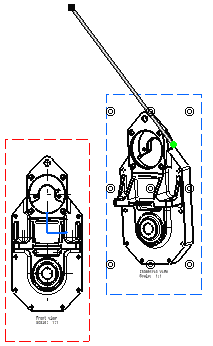
| 4. Click the edge according to which you want the isometric view to be
aligned. 5. Click one anchor point, for example, the bottom right one. The view anchor point aligns to the green point and thereby to the direction positioning line. 6. As you move the cursor over the direction positioning line, the position and length coordinates of the line appear.
|
|||
Note that you may also select the front view frame and
align the
isometric view to the front view according to the barycenter.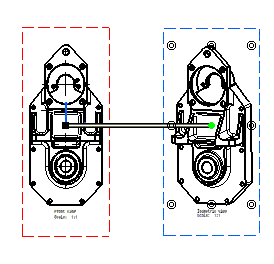 |
|||
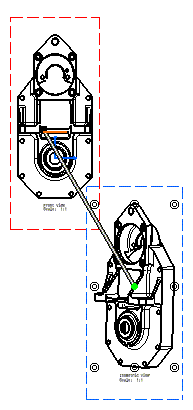
| 7. Using the green point, you can
rotate the isometric view around the
front view.
|
|||
| 8. Using the direction positioning line, translate the
isometric view along the direction line and locate it at the desired distance.
|
|||
| If you happen to modify the length of the direction
positioning line, this new length will be kept whatever positioning modifications you may
apply to the isometric view. Note that if you had previously positioned this isometric view according to a point, not only the line length but also the line angle will be kept.
9. Click in the free space to leave view relative positioning.
|
|||
| As you use relative positioning, do not try to move the view outside of the anchor point frame. If you do so, you will leave view relative positioning. | |||
Additional Positioning:You can also perform the following: |
|||
|
|||
|
|||