Generating Dimensions in One Shot
| Before You Begin, make sure you customized the following settings:
Dimension generation: |
| This task will show you how to generate dimensions in one shot from the constraints of a 3D part. Only the following constraints can be generated: distance, length, angle, radius and diameter. | ||
| Constraints may be of three kinds:
created manually (i) via the sketcher or (ii) via the 3D part, or else (iii)
automatically created via internal parameters.
|
||
| Open the GenDrafting_front_view.CATDrawing document. Open the GenDrafting_part.CATPart document. | ||
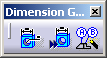
| 1. Click the Generating Dimensions icon |
||
 |
 |
|
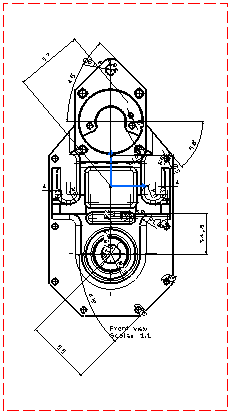
| The dimensions are automatically generated on the front view, which in this particular case, is the only view in the drawing. | ||
In the case of drawings with several views, by default, dimensions are generated on all the views. To generate dimensions on specific views, simply select these views prior to generating dimensions. The selected views will be automatically highlighted, and dimensions will be generated on the selected views only.
|
||
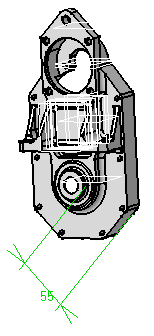
| Drawing view with generated dimensions and one selected dimension: | 3D part with displayed dimension corresponding to the dimension selected on the drawing view: | |
|
 |
|
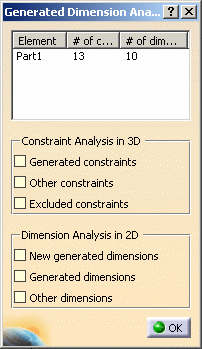
| The Generated Dimensions Analysis
dialog box showing the dimensions and constraints generated for each part
(in this case, there is only one) is automatically displayed.
2. Click OK to close the dialog box.
|
||
|
The generated dimensions are positioned according to the most representative views. In other words, a dimension will appear on a view so that this dimension needs not be also created on another view. | |
|
||