Generating Dimensions
Semi-Automatically

| Before You Begin, make sure you customized the following settings:
Dimension generation: |
| This task will show you how to generate dimensions step by step from the constraints of a 3D part. Only the following constraints can be generated: distance, length, angle, radius and diameter. Constraints may be of three kinds: created manually (i) via the sketcher or (ii) via the 3D part, or (iii) automatically created via internal parameters. | ||||||||
| Open the GenDrafting_part.CATDrawing. In this sample, constraints were manually created. You will then go to Generative Drafting workbench and create views from this part.
|
||||||||
| 1. Select the views on which you want to
generate dimensions. For example, the front view. 2. Click the Generating dimensions step by step icon
The Step-by-step generation dialog box displays and will remain displayed until the end of the dimension generation.
|
||||||||
|
3. Check the Visualization in 3D button to see the constraints corresponding to the dimensions to be created on the views. 4. Check the Timeout option. 5. Click the Next Dimension Generation switch button Dimensions appear one after the other on the views. |
||||||||
| Now, you might need to pause the generation for modifying the dimension
position for example. 6. Click the Pause in Dimension Generation switch
button 7. Select the dimension to be modified. |
||||||||
|
8. Drag the dimension to its new position. |
||||||||

|
||||||||
| Note that, at this step (pause), you can perform
all kinds of modifications before the dimension generation.
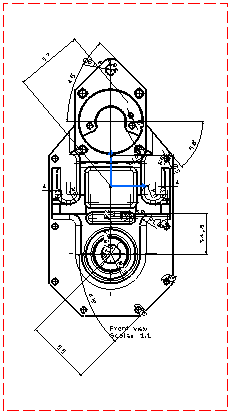
9. Click again the Next Dimension Generation switch button The dimensions are automatically generated on all the views. The dimensions appear as shown, for example, on the front view documented in this particular case.
|
||||||||
 |
||||||||
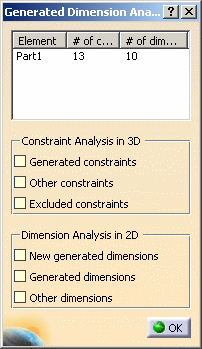
| The Generated Dimensions Analysis
dialog box showing the dimensions and constraints generated for each part
(in this case, there is only one) is automatically displayed. This
dialog
box is described in detail in Dimension Generation Analysis.
|
||||||||
| Note that you can stop at anytime the
generation by clicking |
||||||||
|
||||||||


