Creating Views
| This task will show you how to create views. If the sheet is active, the first view you create is by default a front view. | |
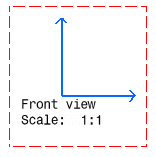
| 1. Click the New View icon 2. Click the Drawing window. A blue axis displays in a red frame. The front view created displays in the specification tree. You can now create 2D geometry in this view.
|
| 3. Click the New View icon |
|||||||||
The views created are projection views as they are linked to the front view. From an active front view, you can create:
|
|||||||||
| If you need to switch to the Third angle projection method, specify it via the Sheet Properties option. | |||||||||
| 4. Activate one of the projection views by double-clicking it. For
example, double-click the contour of a bottom view. 5. Click the New View icon |


|
The following table shows the possibilities of view creation according to the active view. |
| Active View | Resulting Projection Views (linked to the active view) |
|---|---|
Front view |
Bottom view |
Left view |
Rear views or Auxiliary views |
Rear view |
Auxiliary view |