Creating Constraints via SmartPick
| This task shows you how to detect, create and visualize constraints. For example, let's create two constrained parrallel lines. | ||
| 1. Click the Create Detected Constraints
2. Create a first line. 3. Create a second line. |
||
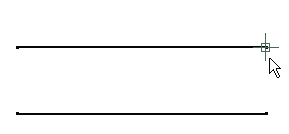
| SmartPick can be used to create certain elements on the drawing. More precisely, only the elements which the cursor last went over will be used to apply SmartPick constraints. In other words, you simply need to move the cursor over the element you want to use as reference for a constraint. | ||
| No element is picked:
|
||
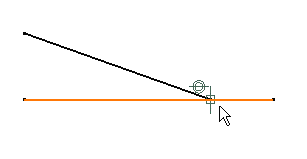
To detect parallelism constraints, |
As a result, a parallelism constraint is detected and created. | |
|
|
 |
|
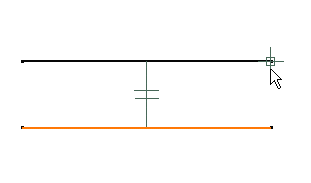
| To visualize detected and created constraints, make sure the Show
Constraints command
|
||
| When a constraint is detected by smartpicking, you can temporarily
deactivate this constraint by maintaining the Shift key pressed. When a constraint is detected by smartpicking, you can temporarily lock this constraint by maintaining the Ctrl key pressed. |
||

|