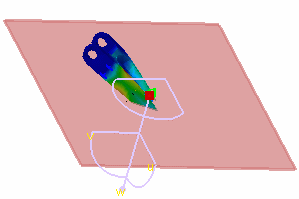
Cut Plane Analysis
| Cut Plane Analysis consists in visualizing
results in a plane section through the structure. By dynamically changing the position and orientation of the cutting plane, you can rapidly analyze the results inside the system.
|
|||||
| This task shows how to use the Cut
Plane Analysis capability.
|
|||||
| You can use the sample26.CATAnalysis document:
you created a Stress Von Mises image.
Before You Begin:
|
|||||
|
1. Click the Cut Plane Analysis icon The Cutting Plane automatically appears.
The Cut Plane Analysis dialog box is displayed.
The compass is automatically positioned on the part, with a Cutting Plane normal to its privileged direction. Note that if the compass is already positioned on the view, the normal of the compass is taken into account as the default normal of the cutting plane. 2. Handle the compass using the cursor and rotate or
translate the Cutting Plane.
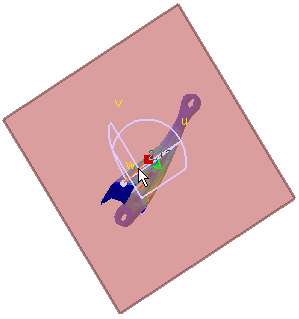
4. De-activate the Show cutting plane option in the Cut Plane Analysis dialog box to see only the boundary of this cutting plane.
5. Click CLOSE to exit the Cut Plane application.
|
|||||
|
|||||
|
|
|||||