Extrema Detection
| Extrema Detection consists in localizing points where a results field is maximum or minimum. You can ask the program to detect
either one or both global extrema and an
arbitrary number of local extrema for
your field.
|
|||||
| This task shows how to use the
Extrema Detection capability.
|
|||||
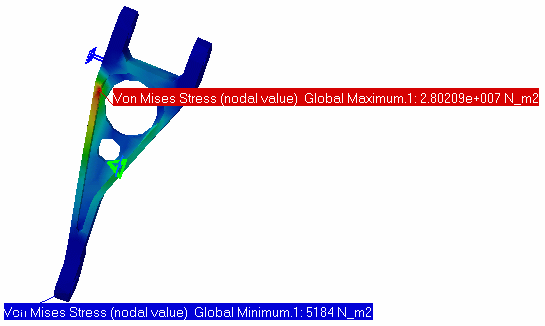
| You can use the sample26.CATAnalysis document:
you created a Stress Von Mises image.
Before You Begin:
|
|||||
1. Click the Search Image Extrema
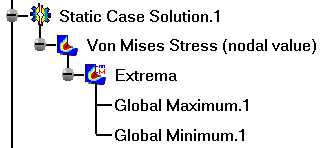
3. Click OK to exit the dialog box. The Extrema object set containing the two Global Extrema appears under the current Image object in the specification tree.
The Extrema Edition dialog box appears. You can modify the objects set by setting the Global and Local switches.
5. Set the Global switch to off and the
Local switch to on.
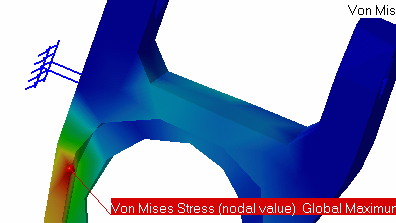
The Extrema objects set in the specification tree now contains, in addition to the two Global Extrema objects, as many Local Extremum (Maximum or Minimum) objects as you have required. 6. Double-click one of the Local Extremum
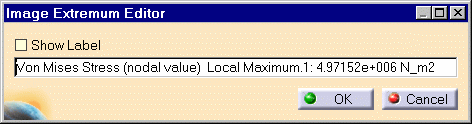
objects in the specification tree.
7. Set the Show Label option to on and then OK, in the Image Extremum Editor dialog box. A new arrow box is visualized, locating the position of the corresponding point and containing information about the detected value. 8. Click OK to exit the Image Extremum Editor dialog box.
|
|||||
| The extrema detection capability is also available for
images obtained under Frequency
and Buckling Solutions.
|
|||||
|
|
|||||