 |
The steps below describe how to cut
and paste or how to copy and paste Part Design features.
We recommend you to use these commands when you do not need to
re-specify the features you paste or if you do so, these features should
not require too many specifications. Basically, you should use these
commands for simple features. |
 |
1. |
Select
the object you want to cut or copy. |
| |
2. |
To cut,
you can either:
 | click the Cut icon  |
| select the Edit->Cut command |
| select the Cut command in the contextual menu, or |
| in the geometry area or the specification tree, drag the selection
(although not a graphical cut, this is equivalent to the cut
operation). |
This places what you cut in the
clipboard. |
| |
|
To copy, you can either:
| click the Copy icon  |
| select the Edit->Copy command |
| select the Copy command in the contextual menu or |
| in the geometry area or the specification tree, press and hold down
the Ctrl key and drag the selection. |
This places what you cut in the
clipboard. |
|
3.
|
To paste,
you can either:
| click the Paste icon  |
| select the Edit->Paste command |
| select the Paste command in the contextual menu, or |
| in the geometry area or the specification tree, drop what you are
dragging (see above). |
|
 |
|
Dragging and dropping objects (features or
bodies) onto objects (features or bodies) is a quick way to copy objects
too. Note however, that the option Enable Drag-Drop must be on to use the
capability. |
|
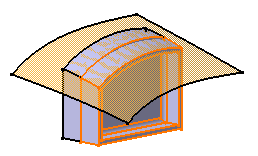
|
In the example below, the second body is a copy
of Part Body. The user just modified the profile. |
|
|
 |