Adding a Generative Bill of Material
| This task will show
you how to insert Bill of Material information into the active view.
This Bill of Material corresponds to information on the
product element which the views were generated from. This Bill of
Material, or parts list, consists of an itemized list of the several parts
of a structure shown on a catdrawing or on an assembly. Choose a task:
|
|||||||||||
Generating a bill of material |
|||||||||||
| Open the Product_Balloon.CATDrawing document.
Open the Product_Balloon.CATProduct
document.
|
|||||||||||
|
|||||||||||
| You are in the
background view (you first selected Edit -> Background View from the toolbar) 1. Click
the Insert Bill of Material icon 2. Click the Product from the specification tree in the CATProduct document. 3. Click the point at which the Bill of Material is to be inserted.
OR You are in the working
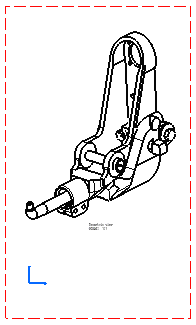
views 1. Select Insert -> Generation -> Bill of Material command, 2. Click the point at which the Bill of Material is to be inserted. In this example, click at the bottom right of the isometric view. Before positioning the Bill of Material, you can pre-define the position. For this, use the Text Properties toolbar and select either one of the top or one of the bottom anchor points.
|
|||||||||||
| Note that, if no Product is or several Products are opened, you will first select the Product source. | |||||||||||
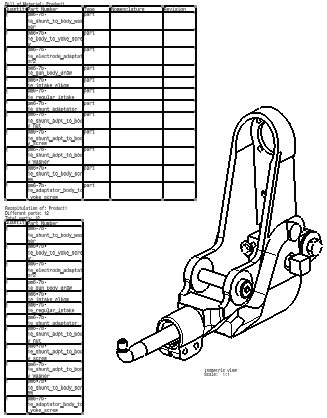
The Bill of Material automatically appears:
|
|||||||||||
Modify Bill of material |
|||||||||||
Modify the content |
|||||||||||
| To modify the contents of the Bill of Material and display given properties, go to Product Structure workbench, select from the menu bar: Analyze->Bill of Material ->Listing Report. | |||||||||||
Modify the content visualization |
|||||||||||
|
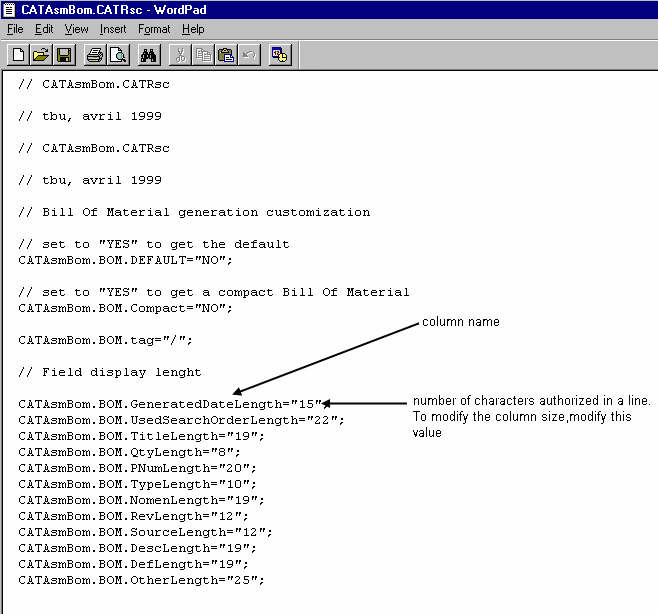
To modify the way you visualize the contents, modify file called CATAsmBOM.CATRsc. It allows you to modify the columns size:
|
|||||||||||
| Bill Of Material cells are associated to the Product Structure Attributes. | |||||||||||
Drawing Update after part modification |
|||||||||||
|
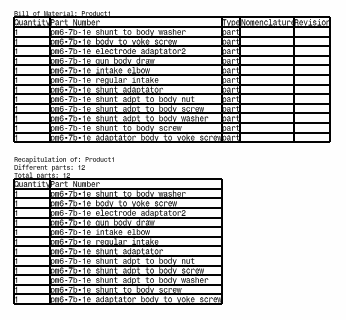
Open the Product_Balloon.CATDrawing document. Open the Product_Balloon.CATProduct document. Add a bill of material. You obtain the following bill of material:
|
|||||||||||
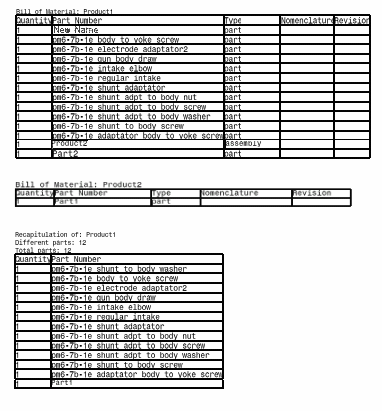
| 1. Replace the Part Number "pm6-7b-1e shunt to body washer" by "New Name" (for this edit Part Properties in the Part contextual menu, and change the Part Number in Product tab). | |||||||||||
| 2. Refresh the
drawing. The Bill Of Material has changed, "pm6-7b-1e shunt to body
washer" is replaced by "New Name".
|
|||||||||||
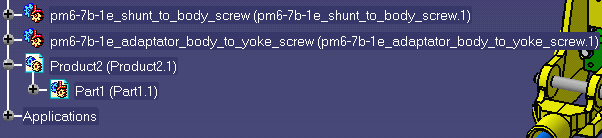
| 3. Add a new product and a new part in this
product (see Part Design user's guide and Assembly Design User's
Guide):
|
|||||||||||
| 4. Update the drawing, the Bill Of Material
is updated:
|
|||||||||||
| 5.
Remove the Product you have added in step 3 and update the drawing one
more time:
|
|||||||||||