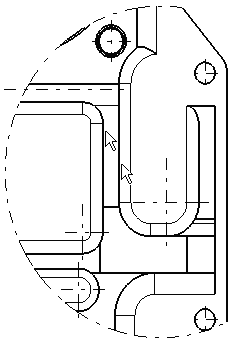
Creating a Detail View

This task will show you how to create a detail view from the front view you previously generated.
1. Click the Drawing window, and click the Detail View icon I_DrwDetailViewP2.gif (262 bytes) from the Views toolbar (Details subtoolbar). tbviews.gif (5102 bytes)
2.

3.  

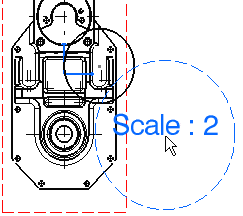
Click the callout center.

Drag to select the callout radius.

gscreatedetailview02.gif (4393 bytes)

gscreatedetailview02.gif (4393 bytes)
4.  Click a point on the callout.

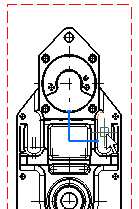
A blue circle appears at the position of the cursor.


5.


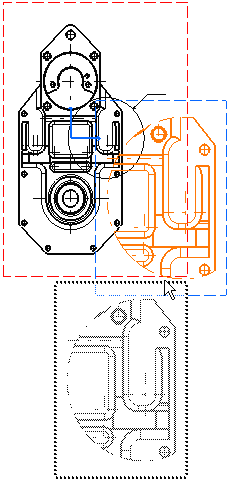
Move the previewed detail view to the desired location.

gscreatedetailview02.gif (4393 bytes)
6.   Click inside the blue circle to position the detail view at the desired location.
7. If needed, drag the detail view to a new position.
gscreatedetailview02.gif (4393 bytes)

 gscreatedetailview02.gif (4393 bytes)

As shown above, the scale by default is twice that of the active view. You can modify this scale. For this:

8.

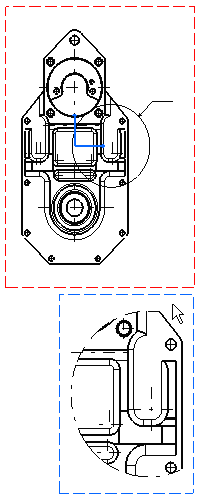
Right-click the detail view and select the Properties option from the contextual menu, View tab, enter 4 as Scale and click OK.

gscreatedetailview02.gif (4393 bytes)

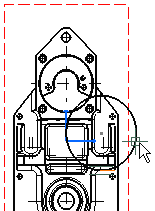
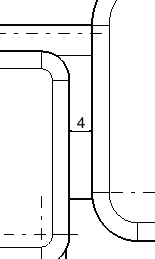
In this particular case, we will add a dimension to the detail view. For this:

9. Click the  Dimensions icon I_CornerP2.gif (181 bytes) from the Dimensioning toolbar.


10.

Click both required elements in the view as shown here.

11.

Enter 7mm as graphical value font size, in the Text Properties toolbar.

gscreatedetailview02.gif (4393 bytes)

gscreatedetailview02.gif (4393 bytes) The dimension appears:

gscreatedetailview02.gif (4393 bytes)