Lining up Dimensions (Free Space)
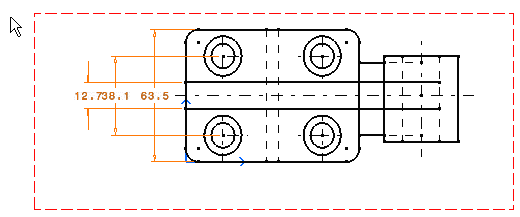
This task will show you how to line up the following
dimensions relative to a point in the free space:
|
|||||||||||
| In other words, you are going to organize dimensions into a system with a linear offset. The offset will align the dimensions to each others as well as the smallest dimension to the reference element. | |||||||||||
| Open the LineUp_Dimensions01.CATDrawing document.
|
|||||||||||
| 1. Select the dimensions to be lined up. 2.
Right click and select Line-up option from the contextual menu or click on the Line-Up icon
|
|||||||||||
| You can also select Tools->Positioning->Line-up item from the menu bar. | |||||||||||
| 3. Click anywhere on the drawing.
|
|||||||||||
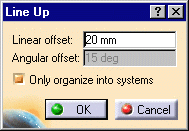
| The Line Up dialog box appears: 4. Enter the desired Linear offset value. For example, 20 mm. 5. Click the Only organize into systems option. 6. Click OK to validate. The position of the smallest system dimension will not be modified. The stacked system dimensions will be aligned to this smallest dimension. The dimensions are now aligned:
|
|||||||||||
| When you click in the free space, the linear offset between the smallest dimension and the reference is automatically set to 0 value. The space between two dimensions will be the space defined in the Options dialog box (Tools->Options, Mechanical Design ->Drafting at the left of the dialog box, Dimension tab, Line Up paragraph). See Dimension Creation for more details. | |||||||||||
|
|||||||||||


