Creating Smooth Spring Virtual Parts
|
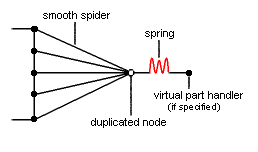
A Spring Smooth Virtual Part is an elastic body connecting a specified point to a specified geometry, behaving as a 6-degree of freedom spring in series with a mass-less rigid body which will softly transmit actions (masses, restraints and loads) applied at the handle point, without stiffening the deformable body or bodies to which it is attached. The Spring Smooth Virtual Part does approximately take into account the elastic deformability of the parts to which it is attached. The program proceeds as follows:
The Spring Smooth Virtual Part is built with Smooth Spider and Spring elements.
To know more about those elements, see Smooth Spider and Spring in the Finite Element Reference Guide.
|
|||||||||||||||||
Spring Smooth Virtual Parts can be applied to the following types of Supports:
|
|||||||||||||||||
| This task shows how to
create a Spring Smooth Virtual Part between a point and a geometry support.
|
|||||||||||||||||
|
You can use the sample28.CATAnalysis document from the samples directory for this task: Finite Element Model containing a Static Analysis Case and computed corresponding Static Solution. A Part Design point was created on the associated CATPart document. Before You Begin:
|
|||||||||||||||||
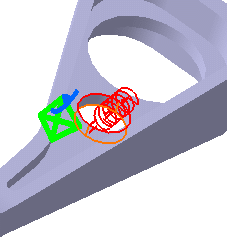
| 1. Click the Smooth Spring Virtual Part icon
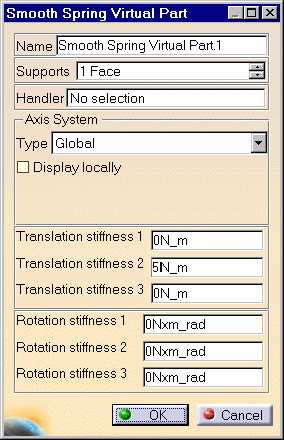
The Smooth Spring Virtual Part dialog box is displayed.
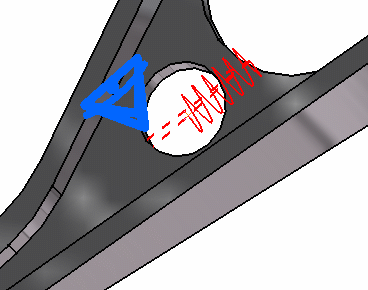
3. Position the cursor on the Handler field in the Smooth Spring Virtual Part dialog box and select a point for the handler point (the handler point symbol appears as your cursor passes over it).
|
|||||||||||||||||
|
|||||||||||||||||
|
The Axis System Type combo box allows you to choose between Global and User Axis systems, for entering components of the resultant moment vector.
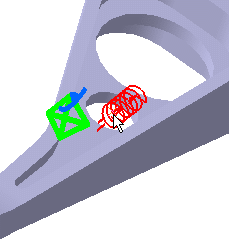
To select a User Axis system, you must activate an existing Axis by clicking it in the features tree. Its name will then be automatically displayed in the Current Axis field. 4. Set the Axis system. 5. Enter values for the 6-degree of freedom spring constants. 6. Click OK to create the Smooth Spring Virtual Part. The symbol appearing at the handler point represents the Smooth Spring Virtual Part.
|
|||||||||||||||||
|
|||||||||||||||||
|
|||||||||||||||||