Remove Lofted Material
| This task shows how to remove
lofted material.
The Remove Loft capability generates lofted material surface by sweeping one or several planar section curves along a computed or user-defined spine then removes this material. The material can be made to respect one or more guide curves. |
||||||||||||
| Open the RemoveLoft1.CATPart document. | ||||||||||||
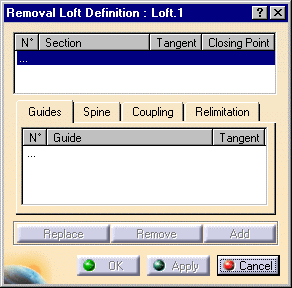
| 1. |
The Remove Loft Definition dialog box appears. |
|||||||||||
 |
||||||||||||
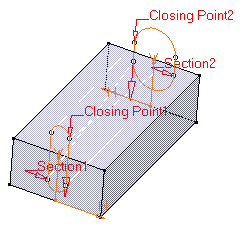
| 2. | Select both section curves as shown Sketch.3 and
Sketch.4:
They are highlighted in the geometry area. |
|||||||||||
|
|
||||||||||||
| 3. | Select Closing Point 2 as shown on Section 2 to redefine the closing point. | |||||||||||
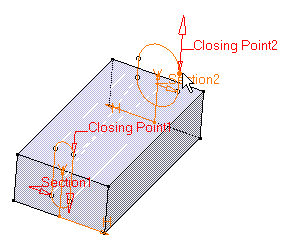 |
||||||||||||
| 4. | Click Closing Point 2 arrow to reverse the direction. | |||||||||||
 |
||||||||||||
|
It is possible to edit the loft reference elements by first selecting a curve in the dialog box list then choosing a button to either:
|
||||||||||||
|
By default, the application computes a spine, but if you wish to impose a curve as the spine to be used, you just need to click the Spine tab then the Spine field and select the spine of your choice in the geometry. |
||||||||||||
|
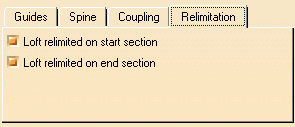
The Relimitation tab lets you specify the loft relimitation type. You can choose to limit the loft only on the Start section, only on the End section, on both, or on none.
|
||||||||||||
 |
||||||||||||
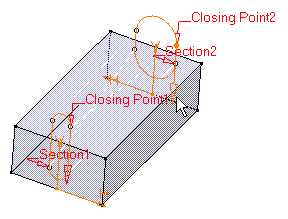
| 5. |
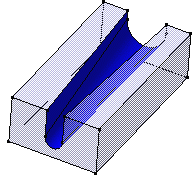
Click OK to create the lofted surface. The feature (identified as Loft.xxx) is added to the specification tree. |
|||||||||||
 |
||||||||||||
|
|
||||||||||||