 |
This new capability
enables to keep the specification of a multi-selection input so that is
easily manipulated.
It is available with the following functionalities: translate,
project,
and axis transformation. |
|
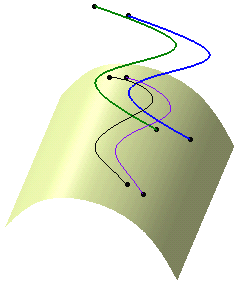
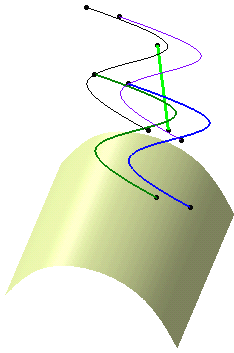
Let's take an example
using the Projection and Translation functionalities. |
 |
Open the Multi-Output1.CATPart
document. |
 |
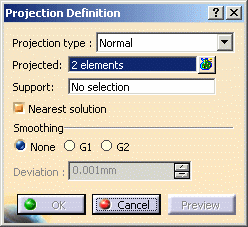
-
Click the Projection icon  . .
The Projection Definition dialog box appears.
-
Select Element.1 and Element.2 as the elements to be Projected.
|
 |
 |
 | To select several elements,
choose the first one either in the 3D geometry or in the
specification tree, click in the Projected field and
choose the second one, etc. |
|
|
|
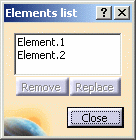
You can display the list of
the projected elements by clicking the icon  .
You can remove or replace an element of the list. Click Close
to return to the Projection Definition dialog box. .
You can remove or replace an element of the list. Click Close
to return to the Projection Definition dialog box. |
|
 |
|
-
Select Extrude.1 as the Support element.
-
Select Normal as Projection type.
-
Click OK to create the projection elements.
|
 |
|
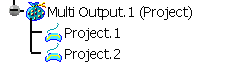
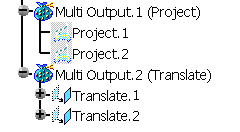
The projection is identified as
Multi Output.1 (Project) in the specification tree. The created elements are aggregated under
Multi Output.1. |
 |
 |
You can create several multi-outputs in the
specification tree, each one grouping one type of elements. |
|
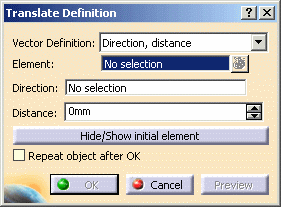
-
Click the Translate icon  . .
The Translate Definition dialog box appears.
|
 |
|
-
Select Element.1 and Element.2 as the Element
to be translated.
-
Select Direction, distance as the Vector
Definition.
-
Select Extract.2 as the Direction.
-
Select -50mm as the Distance.
-
Click OK to create the translated element.
|
 |
|
The translation is identified
as Multi Output.2 (Translate) in the specification tree and appears
below Multi Output.1.
The created elements are aggregated under Multi Output.2.
|
 |
|
| Multi-outputs can be edited separately, simply by
double-clicking it in the specification tree. Elements can be
modified (added, replaced, or removed): the corresponding
multi-output automatically updates. |
| In case the multi-output cannot be created, it is automatically
deactivated in the specification tree. |
|
|
| You can project and translate several elements at a time. In this
case, refer to Editing a List of Elements
to find out how to display and
manage the list of selected elements. |
| The Datum
capability is available. |
|
|

|
 Selecting Using Multi-Output