|
|||||||
|
||||||||
LandSerf uses its own platform independent file format for storing surface
models. Opening and saving of files in this format is achieved via the
Open and Save items in the File menu.
Two raster (surface and drape) models and a vector model may be
simultaneously stored in LandSerf.
To import data in other file formats, select
items from the Import menu. You may also wish to view
some guidelines on importing elevation models
to help with this process.
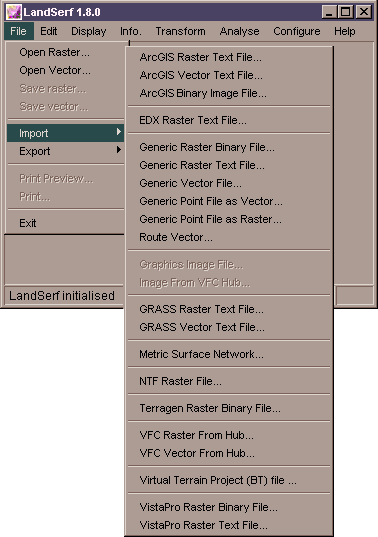 Importing data into LandSerf.
LandSerf can import rasters as ArcGIS ASCII or binary(BIL) files and export ArcGIS ASCII files by selecting the relevant menu items. Even if you do not have access to ArcGIS or ArcView, you may find these facilities useful for sharing data (e.g. see the tutorial exercise). ArcGIS vector files can also be imported and exported as ASCII 'generate' vectors and attribute tables.
If you have access to the GIS GRASS, both rasters and vectors may be exported
using the GRASS modules r.out.ascii and v.out.ascii.
These files may be read directly into LandSerf via the Import
menu. Note that to import vector attributes as well as geometry, you
will need the relevant file from GRASS' dig_att file in addition
to the output produced by v.out.ascii. As with ArcGIS vectors, these
files are specified separately in the dialogue shown below.
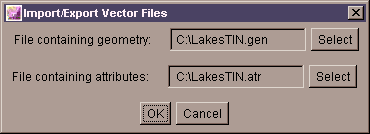 Importing/exporting geometry and attributes.
If you have access to the landscape visualisation software VistaPro or Terragen, you can
import and export rasters directly to and from LandSerf. To export from VistaPro, choose the finest
polygon resolution (1), and select Save ASCII Z from the
Save menu. In LandSerf, select VistaPro Raster Text File
from the Import menu. You can export in either VistaPro's
ASCII or 16 bit binary format using the relevant Export
menu items. To export or import files to or from Terragen, rasters are scaled to 257x257 pixels planimetricly
and 256 (8 bits) integers in elevation. Be aware that this can degrade the quality of the transferred DEM.
Ordnance Survey Raster DEMs at both 10m ('Profile data) and 50m ('Panorama' data)
resolutions may be read using the NTF Raster File option. Note that at
present, NTF vector files (e.g. contours and form lines) cannot be imported or exported.
To import other raster text files, use the Generic Raster Text File
option from the Import menu. Files in this format
consist of ASCII text of nrows rows running North to South, with each
row consisting of ncols columns of whitespace separated z-values. These
numbers may be integer or real. There should be no header information
associated with the file. Note that to import ASCII data that run row-wise from
South to North use the VistaPro import/export instead. To import
ASCII rasters stored column-wise from South to North, select the EDX
import menu item.
 Exporting data from LandSerf.
If you wish to share data with software (or data) that use (x,y,z) coordinate
triplets to locate elevation values (e.g. a spreadsheet), you can use the import/export
Generic Point File options. Data imported this way will be stored as
vector points, but may be converted into a raster by selecting the Transform->Vector to Raster...
option. Export converts the current raster values into a set of (x,y,z) triplets with the option
of sampling points randomly or systematically before output.
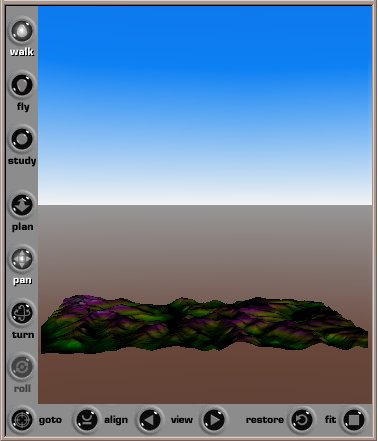 Surface viewed as a VRML world.
While LandSerf contains its own 3d viewer for interactive exploration of surfaces, you may also wish to
export a surface as a VRML world so that it may be viewed by common VRML browsers. Selecting Export->VRML file...
will export the current raster surface and drape and create a simple VRML world in which to display it. The image
above shows such a file viewed by the Cortona VRML browser.
LandSerf will also import the binary 'BT' raster format used by the Virtual Terrain Project. Again, even if you do not use any of the VTP software directly, this can be a useful DEM interchange format for exchanging data.
 Importing rasters from the Virtual Field Course
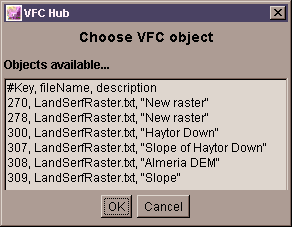
LandSerf can directly import and export surface models and images over the internet via a Virtual Field Course (VFC)
'hub'. The internet location of the VFC can be set in the Configure->Configure Hub
menu along with account details (see the www.geog.le.ac.uk/vfc
for information on data access accounts and the VFC). Once set up, importing raster or vector files results in a dialogue box similar
to the one above identifying available files. Selecting one of the items and pressing the OK button transfers a copy of
the file over the internet into LandSerf. Export of rasters, vectors or images to the hub is achieved by selecting the
relevant item from the Export menu.
The same VFC hub can be used for sharing 3d flythrough routes generated by the 3d surface visualiser in LandSerf (see Chapter 5 for more details).
The display shown in LandSerf's main window can be saved as either a GIF or JPEG graphics
file by selecting the GIF Image File... or JPEG Image File...
from the Export menu. The dimensions of the image will
be set to the size of the graphics window at the time the image is saved.
Graphics files in either the 8 bit GIF or 24 bit JPEG formats may be imported using
the Graphics Image File option. Image files are only really useful
as 'drape' surfaces for visualisation as their integer colour values are unlikely to have any meaningful
value other than colour. They can therefore only be imported once a 'spatial' surface has been created or
imported into LandSerf.
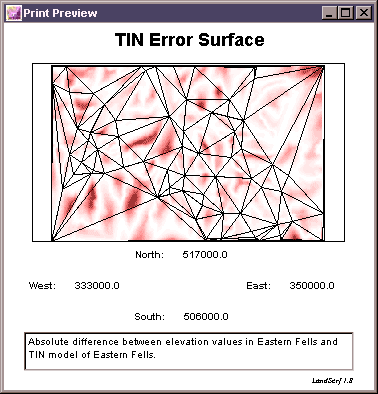 Print preview.
LandSerf can print summary sheets of the current raster surface. Print output
consists of the current raster image displayed in the main window, the title,
bounds and supplementary notes associated with the raster. A preview of the printed
page can be viewed using Print Preview from the File menu.
