Fixing Components Together
| This task
consists in fixing two components together. The Fix Together command attaches selected elements together. You can select as many components as you wish, but they must belong to the active component. |
||
| Open the Fix.CATProduct document. | ||
| 1. | Click the
Fix Together icon This command is also available from the Insert menu and works both in design and visualization mode. |
|
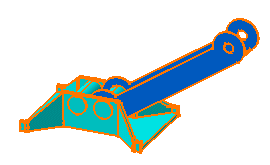
| 2. | Select CRIC_FRAME. | |
| 3. | Select
CRIC_BRANCH_3. You can select the components in the specification tree or in the geometry area. |
|
 |
||
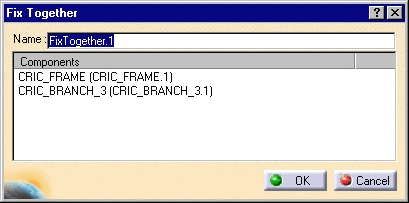
| 4. | The Fix
Together dialog box appears, displaying the list of selected components. To remove a component from the list, just click it. |
|
 |
||
| 5. | In the Name field, enter a new name for the group of components you want to create. For instance, enter FT1. | |
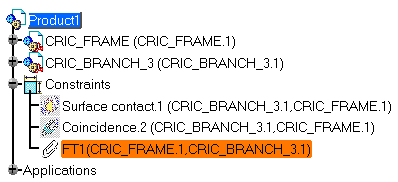
| 6. | Click OK. The components are attached to each other. Note Moving one of them (using the compass combined with the Shift key or using the option "With respect to constraints" in the Manipulate dialog box) moves the other one too. The specification tree displays this operation. |
|
 |
||
Because you can inadvertently move these components, the application displays a warning message to remind you that you are moving components fixed together. If you prefer not to see such a message, just deactivate the display option. To know more about this option, refer to Move Components. |
||
A Few Notes about Fix Together
|
|||
|
|||
|
|||
| You can deactivate or activate a set of attached components by using the Deactivate/Activate contextual command available in the specification tree. Red parentheses preceding the graphic symbol indicate deactivated sets. | |||
|
|||