Creating a New Drawing
| This task will show you how to create more or less automatically a new drawing with pre-defined views generated from a part. | |
| Open the GenDrafting_part.CATPart document. | |
| 1. Select the Start -> Mechanical Design
commands.
2. Select the Drafting workbench.
|
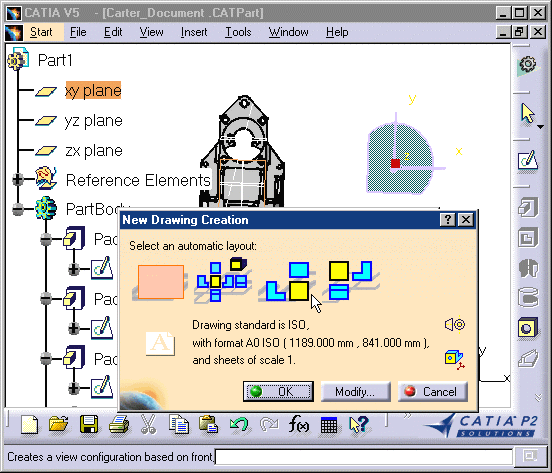
| The New Drawing Creation dialog box appears with information on views that can possibly be created, as well as information on the drawing standards. | |||||||
|
3. Select the views you want to be automatically created on your drawing from the New Drawing Creation dialog box. 4. Click OK. |
|||||||
| You can modify the drawing standards. For this, click the Modify button. | |||||||
| Be careful: the New Drawing Creation dialog box only displays on the condition you previously opened a CATPart document. | |||||||
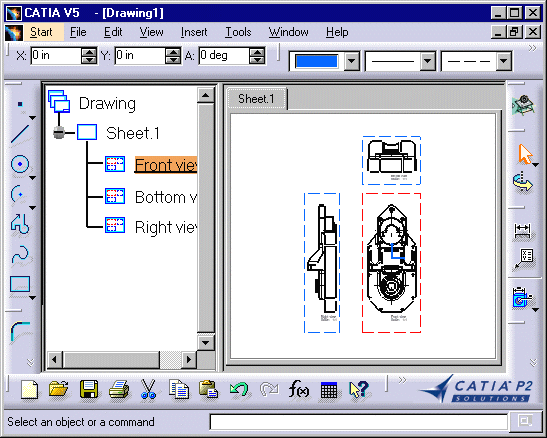
| These are the resulting views generated as you start creating
the CATDrawing, from the opened CATPart.
|
|||||||
| BE CAREFUL: if the color of the part is white and the 3D
colors inheritance option checked, the generated views will result
white and therefore not necessarily properly visualized.
|
|||||||
The resulting view position will depend on the CATPart you
loaded before starting the Drafting workbench. In other words, the views will be
positioned according to:
|
|||||||
|
|||||||

