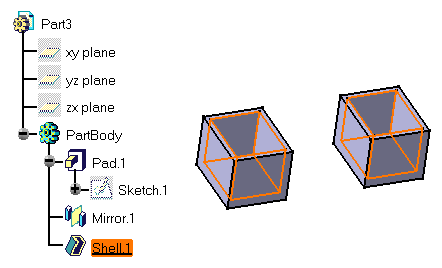
Shell
| Shelling a feature means emptying it, while keeping a given thickness on its sides. Shelling may also consist in adding thickness to the outside. This task shows how to create a cavity. | |||||
| Open the Shell1.CATPart document. | |||||
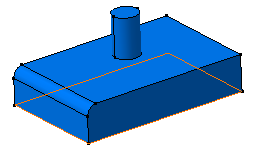
| 1. | Select the face to be removed. | ||||
|
|
|||||
| 2. | Click the Shell icon |
||||
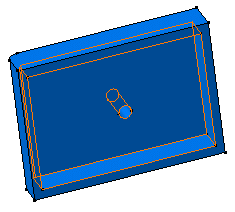
| The selected face becomes purple. | 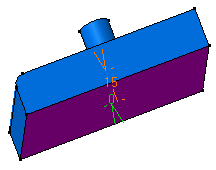 |
||||
| 3. | Enter 15mm in the Default inside thickness field. | 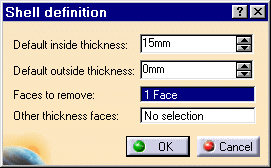 |
|||
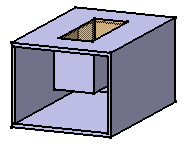
| 4. | Click OK. The feature is shelled: the selected face is left open. This creation appears in the specification tree.
|
 |
|||
| 5. | Double-click the shell to edit it. | ||||
| 6. | Decrease the inside thickness value. Enter 4mm
and click OK.
The cylinder is now hollowed: |
||||
|
|
|||||
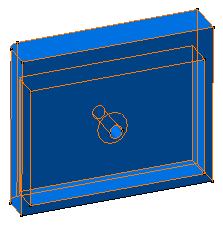
| 7. | Double-click the shell again and click the Other thickness faces field. | ||||
| 8. | Select the face as shown. | 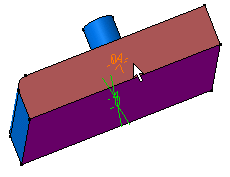 |
|||
| 9. | Double-click the thickness value displayed on this face. | ||||
| 10. | In the dialog box that appears, enter 10mm and
click OK.
The length between the selected face and the shell is 10mm. |
||||
|
|
|||||
A Few Notes About Shells |
|||||
|
|||||
|
|
|||||
|
|||||
|
|
|||||
Solving Problems |
|||||
|
|
Ignoring FacesIn some specific cases, the application cannot shell the selected face. An error message appears informing you that the body cannot be built properly. After closing that window, another message appears proposing you to ignore the face(s) causing trouble. If you accept that solution, the shell is performed and the face causing trouble is removed. |
||||
| Later on if you edit the shell, the ignored face is
previewed and a new option "Reset ignored faces" is
then available in the Shell Definition dialog box. By checking this option, the ignored face is reinitialized and the indication "Ignored face" in the geometry is deleted. If the check box is unchecked, the previous ignored face is still taken into account for the next feature definition. |
|||||
|
|
Ignoring faces in many cases avoids a costly and difficult manual rework of the part. | ||||
|
|
Extracting GeometrySometimes, you will need to use the Extract command to be able to add thickness to a face. The Extract capability lets you generate separate elements from initial geometry, without deleting geometry. This command is available after clicking a dialog box prompting you to deactivate the shell and extract the geometry. Once the operation has been done, a node "Extracted Geometry (Shell.1)" is displayed in the tree. This category includes the elements created by the application. The Extract capability is available if only one face was selected to perform the shell operation. Note also that if you have Generative Shape Design installed, the geometry resulting from the Extract operation is associative. |
||||
|
|
|||||