Creating Enforced Displacements

Enforced Displacements are loads applied to support geometries, resulting for the subsequent analysis in assigning non-zero values to displacements in previously restrained directions.

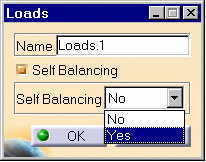
Enforced Displacement objects belong to Loads objects sets. An Enforced Displacement object is by definition associated to a Restraint object.

Make sure you entered non-zero values only for those degrees of freedom which have been fixed by the associated Restraint object. Non-zero values for any other degree of freedom will be ignored by the program.


Enforced Displacements can be applied to the following types of Supports:
Mechanical Feature

 Geometrical Feature

Analysis Feature
Point or Vertex Curve or Edge Surface or Face Volume or Part

Restraint specification

This task shows how to create an Enforced Displacement on a restrained geometry.


You can use the sample20.CATAnalysis document from the samples directory for this task: a Finite Element Model containing a Static Analysis Case and a Restraint object.

Before You Begin:
Go to View -> Render Style -> Customize View and make sure the Shading, Outlines and Materials options are active in the Custom View Modes dialog box.


1. Click the Enforced Displacement icon .
The Enforced Displacement dialog box is displayed.

2. You can change the identifier of the Enforced Displacement by editing the Name field.

3. Activate the appropriate Restraint object by clicking, for example, Clamp.1 in the specification tree (Restraints.1 object set).

4. Enter values for the imposed displacement values corresponding to the restrained degree of freedom of the selected Restraint.

The values of the imposed displacements are displayed on the corresponding Restraint symbol. 

5. Click OK in the Enforced Displacement dialog box to create the Enforced Displacement.
An Enforced Displacement object appears in the specification tree under the active Loads.1 objects set.


ainfo.gif (980 bytes)

If several Analysis Cases have been defined in the Finite Element Model, you must activate a Loads objects set in the specification tree before creating an Enforced Displacements object (only available if you installed the ELFINI Structural Analysis product).
Restraints are required for Stress Analysis computations. They are optional for Modal Analysis computations (if not created, the program will compute vibration modes for the free, unrestrained part).
Enforced Displacement objects can be edited by a double click on the corresponding object or icon in the specification tree.


ainfo.gif (980 bytes) Make sure the computation is finished before starting any of the below operations.


ainfo.gif (980 bytes)

  Products Available in Analysis Workbench

The Elfini Structural Analysis product offers the following additional features with a right mouse click (key 3):

on an Enforced Displacement object:

Enforced Displacement Visualization on Mesh: the translation of your Enforced Displacement object specifications into solver specifications can be visualized symbolically at the impacted mesh nodes, provided the mesh has been previously generated via a Compute action.


on a Loads objects set:

1) Generate Image: generates an image of the computed Load objects (along with translating all user-defined Loads specs into explicit solver commands on mesh entities), by generating symbols for the elementary loads imposed by the Loads objects set. The image can be edited to include part or all of the options available.

2) Report: the partial status and results of intermediate  pre-processor computations are reported in HTML format. It represents a subset of the global Report capability and generates a partial report of the Loads objects set Computation. 

See Creating Pressures for more details.


3) Double-clicking on the Loads set, you will display the Loads dialog box that lets you choose whether you wish to apply self-balancing to the load. Example of use: if this option is used with iso-static specifications, it will allow you to simulate free-body loading. If you make the option active, the center of inertia results null.


Back Up Next