Draft with Parting Element
| This task shows how to draft a part by using a parting element. | |||||||
| Prior to performing this task, refer to Basic Draft, then open the Draft1.CATPart document. | |||||||
| 1.
2. |
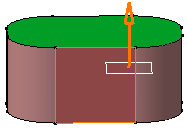
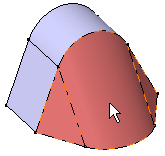
Select the face to be drafted.
The Draft Definition dialog box displays and an arrow appears on the part, indicating the default pulling direction. The selected face is red and highlighted. The application detects that other faces are to be drafted and displays them in light red. |
||||||
|
|
|||||||
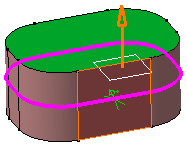
| 3. | Click the Selection field and select plane xy to define the neutral
element. The application displays the neutral curve in pink. |
||||||
|
|
|||||||
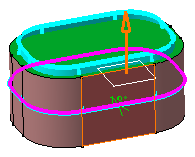
| 4. | Enter 13 degrees as the new angle value. For more information, see Angle Values. | ||||||
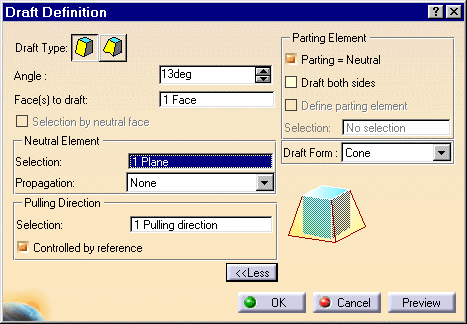
| 5. | Now click the More button to display the whole dialog box and access the Parting Element capability. | ||||||
| 6. | To define the parting element, you can check:
|
||||||
 |
|||||||
| Keep Parting =Neutral. You then can also check the option Draft both sides as illustrated at the end of the scenario. | |||||||
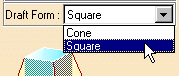
| To get information about the Draft form option, refer to Angle Values. | |||||||
| 7. | Click Preview: the draft is displayed in blue. | ||||||
|
|
|||||||
| 8. | Click OK. Material has been removed, the face is drafted. |
||||||
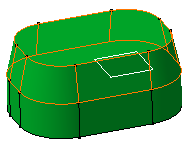 |
|||||||
| 9. | Double-click the draft to edit it. | ||||||
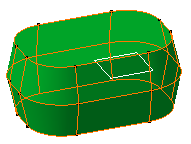
| 10. | Check the option Draft both sides to draft the pad in both opposite directions from the parting element. | ||||||
| 11. | Click OK to confirm.
The pad now looks like this: |
||||||
 |
|||||||
Angle Values |
|||||||
|
|||||||
|
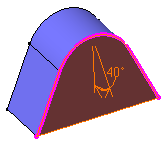
Here is an example of a drafted face obtained using the Square option: |
 |
||||||
 |
 |
||||||
|
The use of the Square option does not guarantee that parts will be easily removed from their molds. |
|||||||
Methodology |
|||||||
|
If you perform a difficult drafting, for example if you obtain twisted faces, use the Deactivate and Extract Geometry commands to solve your difficulties. For more information, refer to Extracting Geometry. |
|||||||
|
|
|||||||