Creating a Front View
| This task will show you how to create a
front view
either from a part or from the sub-part of a product. You will use a reference
plane.
A front view is a projection view obtained by drawing perpendiculars from all points on the edges of the part to the plane of projection. The plane of projection upon which the front view is projected is called the frontal plane.
|
|||||||||||||||||
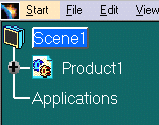
| In a Product Structure context, if you create a front view from a scene of a
product, you can directly select the Scene object in the specification
tree. You do not necessarily need to select the Product and sub-products
any more.
|
|||||||||||||||||
|
Choose a scenario:
|
|||||||||||||||||
| Before You Begin, make sure you customize the following settings:
Grid: View names and scaling factors: 3D colors inheritance |
|||||||||||||||||
Creating a front view |
|||||||||||||||||
| Open the GenDrafting_part.CATPart document. Define a new drawing sheet. | |||||||||||||||||
| 1.
Click the Front View icon
|
|||||||||||||||||
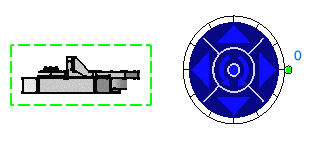
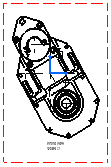
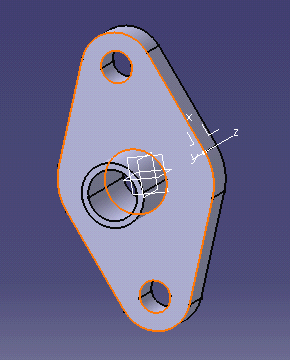
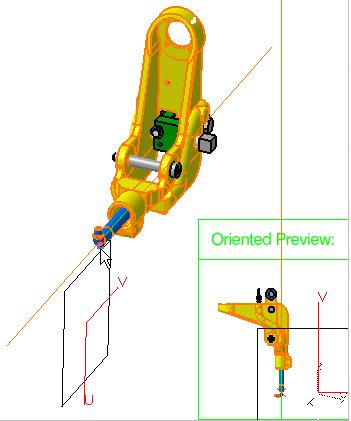
| 2. Select one plane of the 3D part or a plane
surface, to define the reference plane. Blue arrows appear.
|
|||||||||||||||||
| If you select a plane surface, the reference orientation will be the external normal of the planar surface. | |||||||||||||||||
To define the reference plane, you can also select:
In other words, you will select, in the geometry, one of the followings:
|
|||||||||||||||||
| Note that you can redefine the projection plane using the arrows at any time before the view generation. | |||||||||||||||||
|
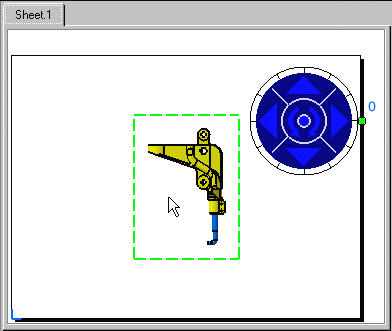
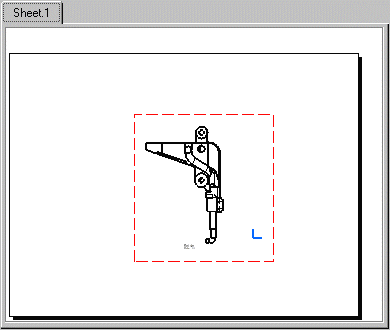
3. Click inside the sheet to generate the view.
|
|||||||||||||||||
|
|
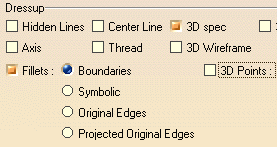
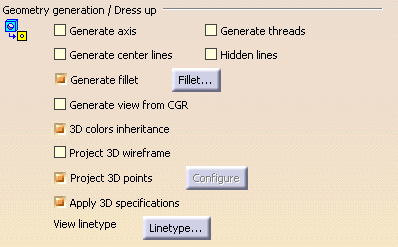
Right-click the frame
of the view, select the Properties option from the contextual menu,
View tab and check the required options in the Properties dialog
box. By default, the axis and center lines are generated.
You can also view hidden lines, threads and fillets. |
||||||||||||||||
| For fillets, you can choose to view either Boundaries, Symbolic,
Original Edges or Projected Original Edges.
|
|||||||||||||||||
|
|||||||||||||||||
Creating advanced front views |
|||||||||||||||||
| The advanced front view command allows the user to make several choices at view creation, such as view name, view scale. Pertinent projection plane is proposed (this plane can be linked by default to local axis) and an object selection caused associated element selection. | |||||||||||||||||
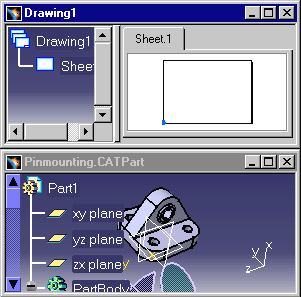
| Open the Pinmounting.CATPart
document. Define a new drawing sheet.
Activate the drawing by selecting drawing window.
|
|||||||||||||||||
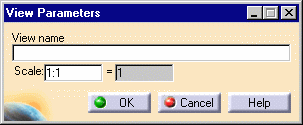
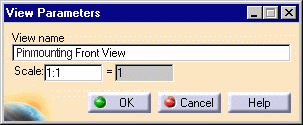
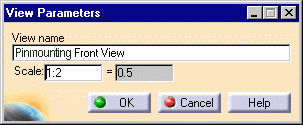
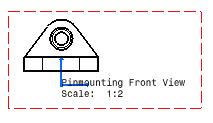
| 1. Click
the advanced front view creation command
2. Name the view in the associated field:
3. Modify the scale value in 1:2
4. Click OK to validate your settings. 5. Select one plane of the 3D part or a plane
surface, to define the reference plane. 6. Click inside the sheet to generate the view.
|
|||||||||||||||||
Creating front view with local axis system |
|||||||||||||||||
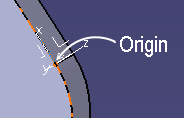
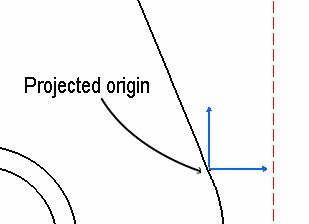
This functionality allows you to
take into account a local axis system when creating a view. That way, the
origin of the generated view is the projection of the origin of the local axis
system selected in the view plane.
|
|||||||||||||||||
| Open the Axisprojection.CATPart document. Define a new drawing sheet. | |||||||||||||||||
| 1. Select
the drawing to activate it and click the Front View icon |
|||||||||||||||||
| 2. In the
Part tree, select the local axis system.
|
|||||||||||||||||
| 3. Select one plane of the 3D part or a plane
surface, to define the reference plane.
|
|||||||||||||||||
| 4.
Click in the drawing to end the view creation. The part local axis system appears in the
view.
|
|||||||||||||||||
Multi-Selecting Sub-Bodies/Sub-Products |
|||||||||||||||||
|
|
You can multi-select sub-products in a product and also bodies in a part. These multi-selected 3D elements will be previewed and then used as reference planes for generating several front views. | ||||||||||||||||
| Open the Product_Balloon.CATProduct document. Double-click Scene1 at the down left of the screen. | |||||||||||||||||
| 1. Click the Front View icon
|
|||||||||||||||||
| 2. Select one body or press the
Ctrl key
and then multi-select the desired elements in the specification tree.
Multi-select several bodies in a product:
3. Select the geometry defining the projection plane. As you go over the geometry with the cursor, the oriented preview automatically appears on the 3D document.
4. Click on the desired plane in the 3D.
|
|||||||||||||||||
| Be careful: once you multi-select bodies or sub-products, and go further into the dialog, you cannot select or de-select any more bodies or sub-products. | |||||||||||||||||
Note that once an element is selected, this element becomes gray colored. In addition, you can only work in one 3D document. If you try selecting another document, you automatically leave the Front View command.
|
|||||||||||||||||
The multi front view is being created and you can still modify the multi front view orientation:
5. Click on the drawing document to generate the views.
|
|||||||||||||||||
| You can insert Bill of Material information into the active view. | |||||||||||||||||
Projecting points from 3D |
|||||||||||||||||
| Open the PointSketch.CATPart document. | |||||||||||||||||
| 1.
In Tools ->Options -> Mechanical Design ->
Drafting -> Generation tab, check
Project 3D Points to allow you to project points from
3D (no construction elements).
Then set the projection parameters: |
|||||||||||||||||
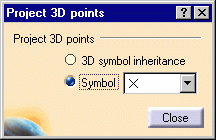
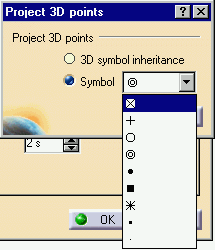
| 2.
Click Configure to open the following dialog box:
|
|||||||||||||||||
3.
You can select the following settings:
Select the cross as symbol. |
|||||||||||||||||
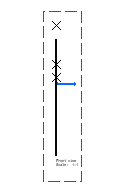
| 4.
Then create a front view
(here with (x, z) plane).
Points from 3D are projected. These points behavior is the same as other projected geometries behavior. It can be dimensioned, dressed-up, isolated, etc. in different view type except section cut views. |
|||||||||||||||||
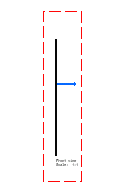
| 5.
Right-click on the front view and select Properties. Choose the View tab and in the Dress-up area, uncheck 3D points.
The points disappear:
|
|||||||||||||||||
| You can modify interactively graphic properties after generation, they will be preserved from view update. | |||||||||||||||||
|
|||||||||||||||||