Make your life easier: use shortcuts!
Among other useful things of Matlab (such as powerful graphics, tons of functions, etc.) are the options to make things easier, more specifically, make repetitive things easier. For this kind of tasks, the shortcuts are an absolute time-saver. You can define as many shortcuts as you want, and then use them with a simple click. In this section, three useful examples are provided, but the important part is to learn how to create them and then you can add as many as you want.
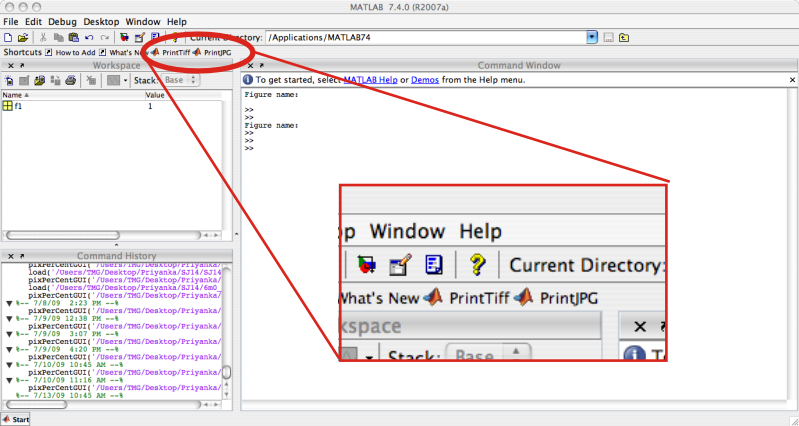
To add a shortcut, you need first to have the code for a repetitive task, for instance, to generate JPG or TIFF images of the graphics you will create. But first, you need to know where shortcuts are placed and used. Take a look at your command window. At the top there will be a line with MATLAB and the version you are running, then another line with File, Edit, etc, then another line with the icons for new file, open, copy and paste, etc, and below that there is the lines for shortcuts.
If you have not added any shortcuts, then the line will only have, "how to add" and "what's new", you can remove these ones later.
Now you need the code, I propose the following three shortcuts that are very handy when printing your figures, either for publication (high quality TIFFs) or dissemination (medium quality JPEGs). The first two shortcuts will generate a figure, TIFF/JPG when you click on them. The third one toggles the axis and the borders of an image.
PrintJPG
First of all, copy the code below, then take your mouse to the line of shortcuts, right-click and you will see a small window, select new shortcut
gcf;
if ~exist('filename','var')
    filename='testFigure.jpg';
end
set(gcf,'PaperPositionMode','auto')
print('-djpeg','-r200',filename)

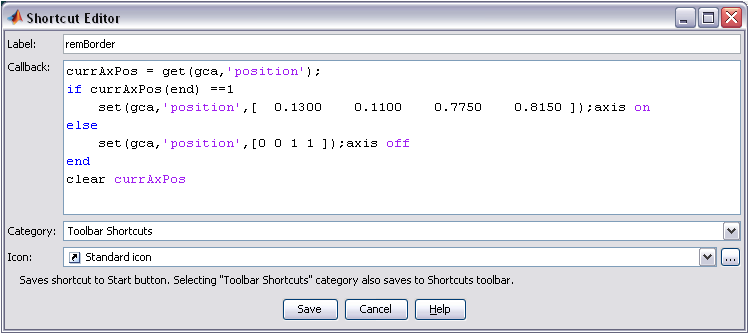
A new window will open, paste the code below into the window and then click save. You can select the type of icon in that same window.
And that is it, the new shortcut will appear in your Matlab command window from now on. To use it, you will first generate a figure, then write down (at the command line) the name with which you want to save the figure as, and then click the shortcut. It could not be simpler!
When you click the shortcut, the image will be saved in the current folder in which you are working, for the image above it would be "C:\Documents and Settings". If you want to save them somewhere else, you can change folders by clicking the icon with the three dots at the right hand side of the line with the current folder, (or through the command line, but it is a bit more complicated). If you want to create a new folder, you can always do it from the command line:
mkdir imageResults
this will create a new folder called imageResults, you can use whichever name you like and then just modify the file name accordingly:
filename='imageResults/nameOfTheImage.jpg'
and then when you click, it will be saved, not on the current folder but in the imageResults. As a general rule, it is better NOT to use spaces or special characters in file names as not all computer systems interpret spaces in the same way. Keep names with a-z, A-Z, and numbers only.
PrintTIFF
Here is the code for a shortcut to print TIFFs:
gcf;
if ~exist('filename','var')
    filename='testFigure.tif';
end
set(gcf,'PaperPositionMode','auto')
print('-dtiff','-r400',filename)
RemoveBorder
This code is very handy, it toggles on and off the axis and removes the borders of a plot. When you plot something in matlab, it will contain by default the axis that show the dimensions of the plot. This may be useful in some cases, for for images, for instance, you may want the image itself without any added axis. Click on the shortcut and presto, the axis appear or disappear as you require them, or not.
currAxPos = get(gca,'position');
if currAxPos(end) ==1
    set(gca,'position',[  0.1300    0.1100    0.7750    0.8150 ]);axis on
else
    set(gca,'position',[0 0 1 1 ]);axis off
end
clear currAxPos
Look at the difference with these examples:
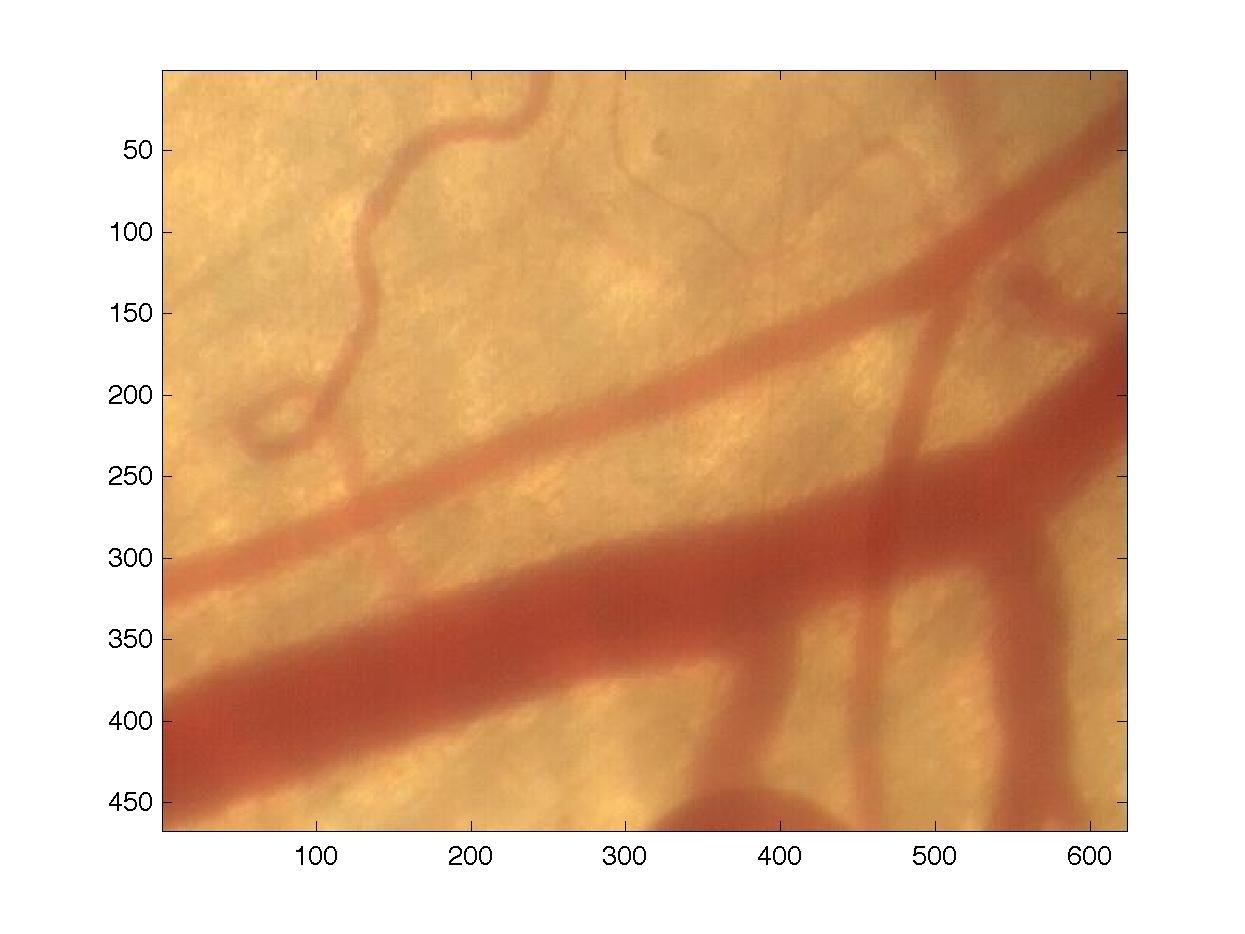
load vasculature
imagesc(X)
colormap(map)
filename='vasculatureBorder.jpg';
and here you click PringJPG shortcut
.
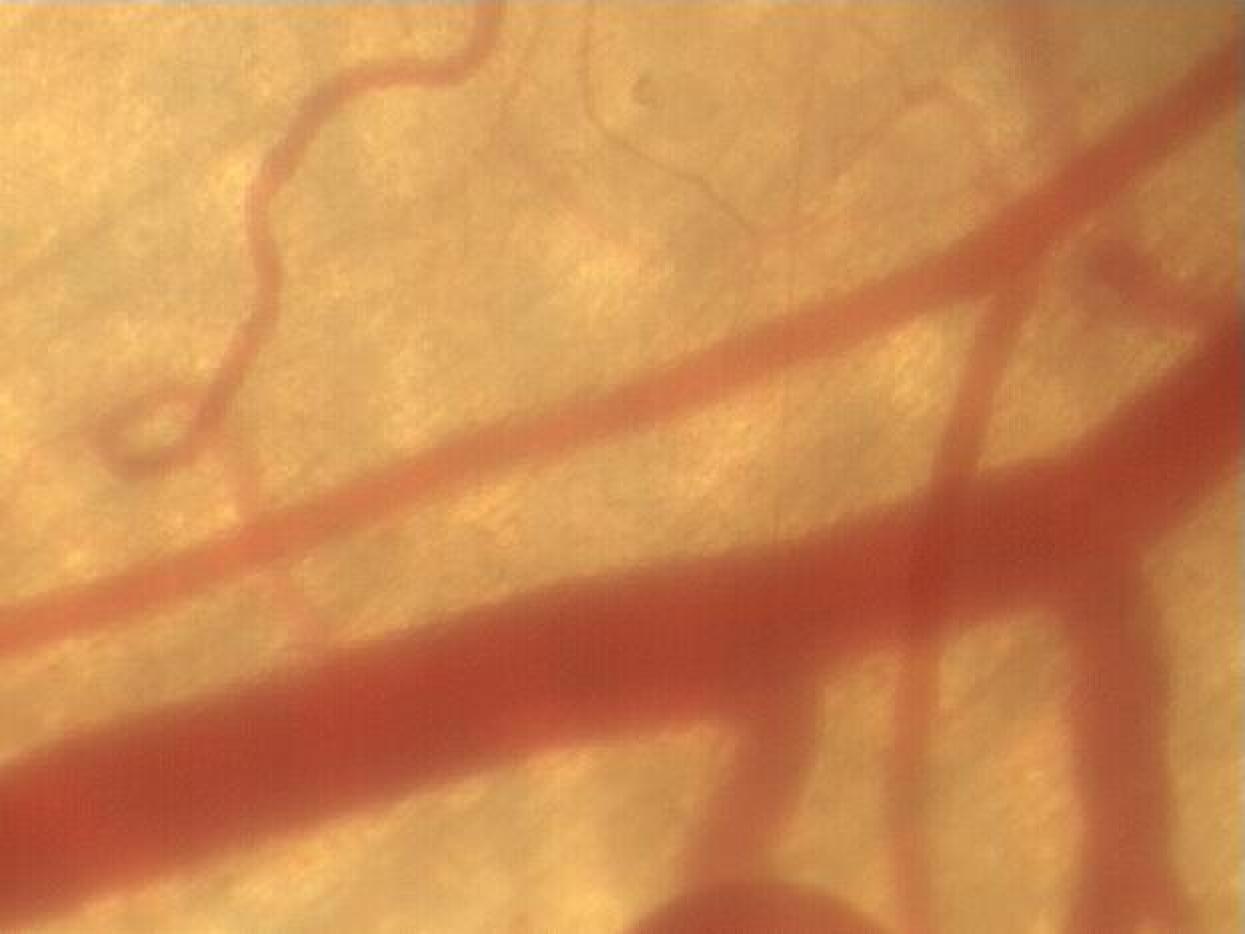
and here you click RemoveBorder shortcut:
.
filename='vasculatureNoBorder.jpg';
and here you click PringJPG shortcut again.
.